The Settings menu has four tabs, Log & Temp Dir, Data Recovery, File Systems, and Miscellaneous. Click Close once you are done. Reset returns the values to their defaults.
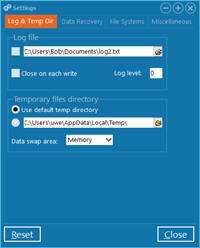
This tab lets you specify some environmental settings, such as usage of external disk resources and where they are put. Make sure you never write anything to the drive you want to recover.
| Log file | |
|
|---|---|---|
| Name: | Select a valid filename and check the checkbox to the left to start logging. ***Do not allow this file to be on the drive you want to recover*** | |
| Close on each write: | Check this if you want to flush the log file to the disk after each write. That is helpful if you need to catch the last message before a program crash, but it slows the program considerably. | |
| Log level: | Define how talkative the logging is. 0 logs important events and errors only, while 1 frequently adds information about the recovery. 2 adds a complete printout of the Recovery Tree. | |
| Temporary file directory | ||
| Use default temp directory: | Put temporary files into your computers temp directory, usually C:\Users\(name)\AppData\Local\Temp\. GetDataBack generates temporary files when you save a recovery or when you view a file. ***Do not allow this directory to be on the drive you want to recover*** | |
| Or: | Check this radio button and type in a directory name for temporary files. | |
| Data swap area: | Memory, Auto, or Disk. Default for 64-bit Windows is Memory, default for 32-bit Windows is Auto. This setting determines where GetDataBack's Recovery Tree is stored. That data structure can be massive, depending on the number of files in the recovery. 64-bit system has plenty of memory, while a 32-bit system might require using disk space to prevent the program from running out of memory. The rule of thumb is that 4 GB of RAM is needed for each 6 million files. | |
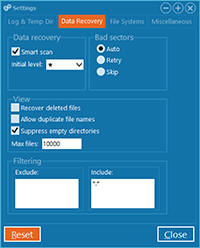
In the Data Recovery tab, you can change settings that control several aspects of the data recovery engine, like sophistication level, bad sector handling, and more.
| Data recovery |
 |
|
|---|---|---|
| Smart scan: | Smart scan automatically chooses between four different sophistication levels. If you turn this off, GetDataBack scans the entire drive. | |
| Initial level: | When Smart Scan is enabled, select the initial sophistication level, between 1 (*) and 4(****) | |
| Bad sectors | ||
| Strategy: | GetDataBack reads data in blocks of 64 sectors (32 KB). If the read operation fails, the program can Retry the operation for each sector or Skip the entire block. Auto lets the program pick the approach. It is almost always advisable to skip the block. Doing otherwise puts stress on the damaged drive with usually little benefits. | |
| View | ||
| Recover deleted files: | Presets the value of the Deleted checkbox in the Recovery Tree screen. | |
| Allow duplicate filenames: | Presets the value of the Duplicates checkbox in the Recovery Tree screen. | |
| Suppress empty directories: | If set, GetDataBack removes empty directories from the Recovery Tree. | |
| Max files: | Maximal number of entries GetDataBack shows in the Recovery Tree. Default is 10,000. The limitation only affects the display. If you choose to copy the containing directory, all files are being copied, independent of the value set here. | |
| Filtering | ||
| Exclude: |
You can exclude files from the Recovery Tree. Usually, you would leave this field empty. Special circumstances, such as memory problems, might justify the exclusion of certain file types. If, for example, you want to exclude TMP and BAK files you would specify:
|
|
| Include: | This field determines the files that you want to include in the
Recovery Tree. As you usually want to include
all files, it is set to *.* by default. In collaboration with the Exclude above, the filter works in this order:
Set these options in or before the Select File System screen. |
|
Change file system specific settings here. You can include or exclude file systems, or modify how they are recovered.
| File systems | 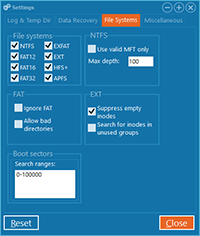 |
|
|---|---|---|
| NTFS, FAT12, FAT16, FAT32, EXFAT, EXT, HFS+, APFS: | Check all the file systems you want to include in the search for file systems. By default, all file systems are enabled. It is a good idea to uncheck file systems that you know you had not on the drive. | |
| NTFS (only) | ||
| Use valid MFT only: | This feature restricts the file entries to those referred to by a valid MFT. Thus, you can get rid of unwanted fake files and reduce cluttering in the Recovery Tree. That is helpful if there are Virtual Machines or backup images on the drive that interfere with GetDataBack's recovery engine. For this to work, though, there must be a valid MFT. Set this option if you have many unwanted files in the Recovery Tree. If you do not find the files you are looking for, make sure this option is off. To be effective, set this option in or before the Select File System screen. | |
| Max depth: | This limits the maximal subdirectory depth. | |
| FAT (only) | ||
| Ignore FAT: | Checking Ignore FAT causes GetDataBack to allocate files without using an eventually found FAT. Forgoing the FAT can be useful when the found FAT does not reflect the file system you are currently recovering. It is better to use no FAT than using a FAT containing false information. Check this box only if you are not satisfied with the results in the Recovery Tree. This option must be set in or before the Select Drive screen. | |
| Allow bad directories: | To ensure a high quality of recovery, GetDataBack dismisses information that might look like directories, but most likely is not. Check Allow bad directories if you believe that files or directories are missing in the Recovery Tree or if you want the program to interpret even less promising directory information. This option must be set in or before the Select Drive screen. | |
| EXT (only) | ||
| Suppress empty inodes: | If set, do not include empty inodes in the Recovery Tree. This setting prevents clutter in the Recovery Tree. | |
| Search for inodes in unused groups: | If set, the program scans unused groups for inodes. This feature slows down the recovery; therefore, it is turned off by default. | |
| Boot sectors | ||
| Search ranges: | The program adds the range or ranges defined here to the list of sectors that it searches for boot sectors. This list can provide a tweak for lower-level scans to find the desired file system. | |
| Debug | 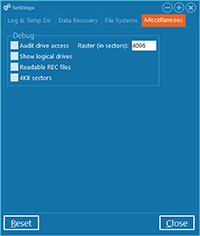 |
|
|---|---|---|
| Audit drive: | This checkbox enables Drive Auditing. When GetDataBack audits a drive, it tracks accessed sectors to later write them to a file for support purposes. The Raster determines the number of sectors taken along with each direct hit. | |
| Show logical drives: | Usually, you only need physical drives, images, or virtual images. If under special circumstances, you wish to add logical drives (C:, D:, etc.) to the screen, you can do so by checking Show logical drives. This checkbox adds a blue tile to the Select Drive screen. Click on it, and the program adds all compatible logical drives as blue tiles. | |
| Readable REC files: | REC files are the files used by Save and Load Recovery. They contain a detailed description of the status of the recovery and the content of the Recovery Tree. If you use "readable" REC files, they are easier to read for humans, but larger. | |
| 4KB sectors: | Treat the drive as having 4KB sectors. This setting helps to recover certain drives over 2 TB that use the 4K-sector-hack to address the space beyond 2 TB. GetDataBack tries to adjust to those drives automatically. However, it might need this setting, especially if the drive is no longer accessed through its original USB enclosure. | |
See also: Sophistication level, Drives, Save & Load Recovery