Running RAID Reconstructor
Reconstructing a RAID is not a trivial task. Many things can cause the software not to produce the correct settings to ensure a correctly constructed array. Here are a few steps you will need to follow. Download
Hint If you want to recover a broken NAS RAID, you might be interested in our easier-to-use NAS Data Recovery software.
Hint If you want to recover a broken Windows RAID, you might be interested in our easier-to-use RAID Recovery for Windows software.
Steps of a Typical RAID Recovery
-
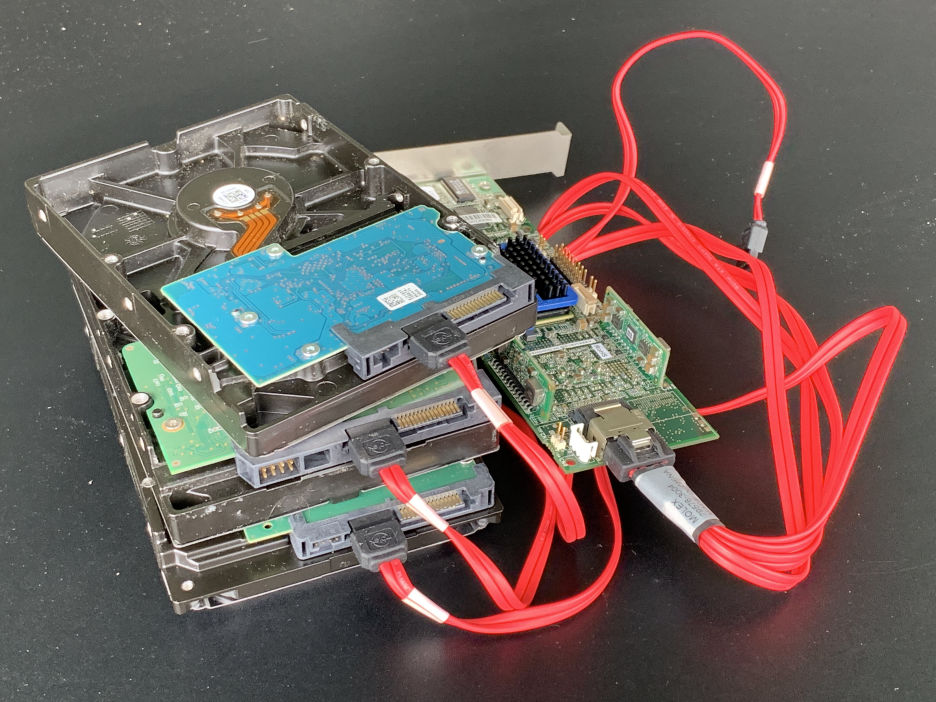
1. Provide individual drive access —

RAID Controllers: Drives with original Adaptec RAID controller
Attach the RAID members to a non-RAID controller so that the operating system can see all the drives as single drives inside of Windows. The importance of using a non-RAID controller lies in the tendency of RAID controllers to hide individual drives. Access to the combined RAID is not what we want; we need access to all member drives of the RAID. If there are 10 drives in the RAID, we need access to 10 individual drives.

RAID Controllers: We connect the drives to non-RAID SATA ports on the motherboard.
Of course, if you manage to provide individual drive access with the RAID controller, you can do so. Just be aware of the risk that the controller can start an automatic "rebuild", which can destroy your data beyond any chance of recovery.
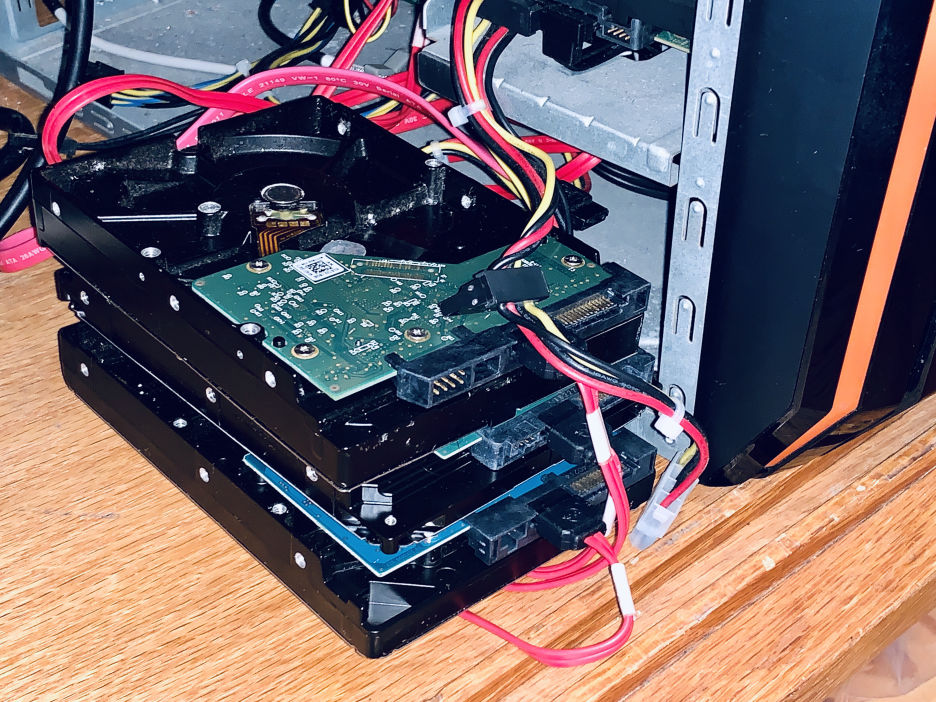
If you are recovering a NAS, you need to remove the drives from the device and attach them locally to your PC.
We play it safe and connect the drives to the computer's unused SATA ports. Thus we gain individual access to the drives. If there are not enough available SATA ports, you can create images of the drives, one-by-one, and then use these images instead of the drives. You can also mix images and drives. We actually continue working with images of the drives,drive1.img,drive2.img, anddrive3.img. -
2. Type in the basic RAID topology —

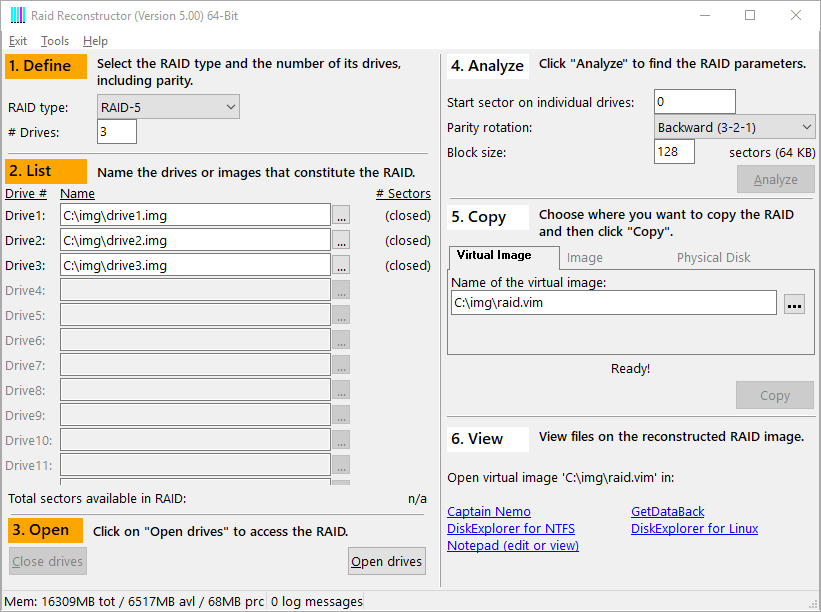
RAID Reconstructor desktop: Choose "RAID-5", 3 drives,
drive1.img,drive2.img, anddrive3.imgStart the software and choose your type of array in the 1. Define box at the top of the screen, RAID-0 or RAID-5. Then type in the number of drives included in the array. Enter all these drives into the 2. List box by right-clicking on the white space next to the drive number and selecting the drives that belong in the array. If your RAID is a RAID-5 with one drive missing, leave one field empty.
-
3. Open the drives —
Once you have entered the basic RAID topology, open the drives by clicking the "Open drives" button in the 3. Open box at the bottom of the drive list on the right-hand side.
-
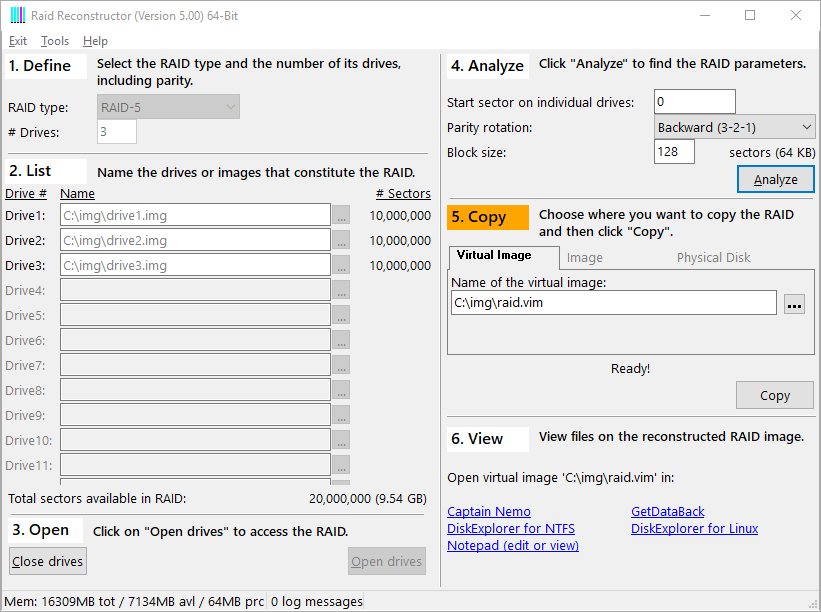
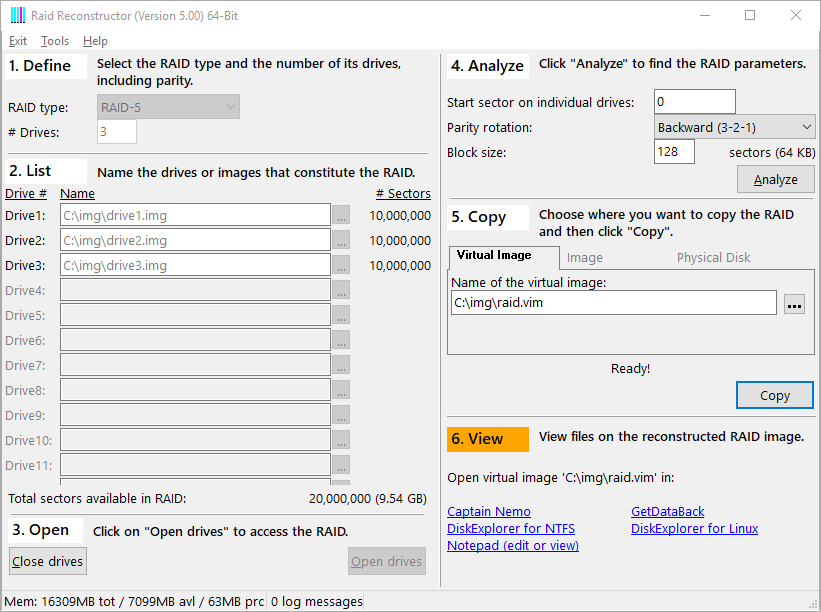
4. Analyze —

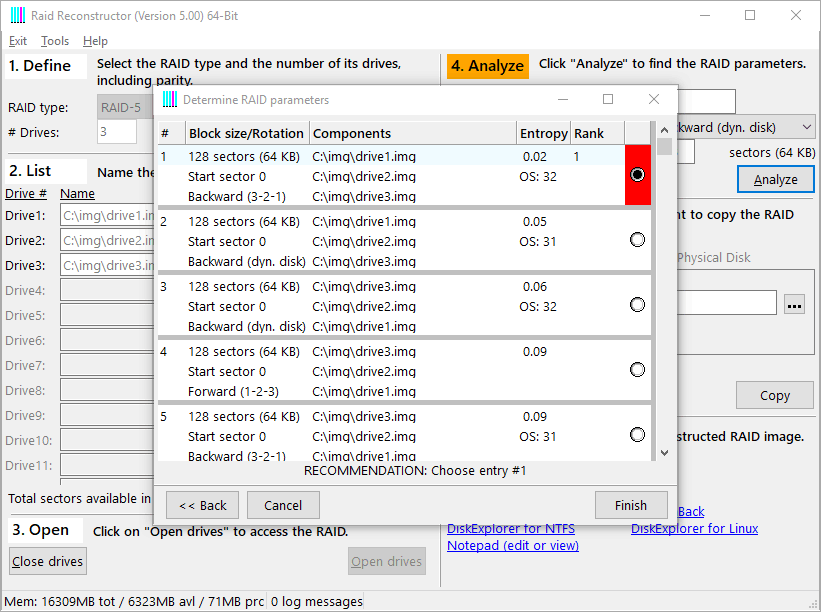
Analysis: This analysis produced a "RECOMMENDED ENTRY". You can now proceed to step 5.
Start analyzing the drives in the orange 4. Analyze box at the top right-hand side of the software. Accept the default settings and click "Next". Click "Next" again. When this process finishes, look at the bottom of the analysis screen to see if you received a "RECOMMENDED ENTRY". If you received a "RECOMMENDED ENTRY", then click "Finish" and go to step 5 of this article.
If it says "RESULT IS NOT SIGNIFICANT", the software did not properly put the array together. If you are unable to produce a "RECOMMENDED ENTRY", do not make an image of the RAID because it will just provide non-working files. You should then consider letting us do a RaidProbe which will allow us to put the array together by hand. Once it is completed, we will send you all the parameters and detailed instructions on how to rebuild the array. -
5. Create an image —

Image: Creating virtual image
raid.vimOnce you have your settings, in step 5. Copy of the software, you have the choice to make a virtual image, an image, or write the data back to a drive directly. You usually choose the virtual image as the other options take a very long time. The virtual image is generated instantly, and you can immediately access this image with Captain Nemo or GetDataBack Pro. In our example, we write the virtual image to file
c:\img\raid.vim. -
6. Access the files —

RAID Reconstructor: Mounting image
raid.vimIn step 6. View , you can retrieve the files from the image you created.

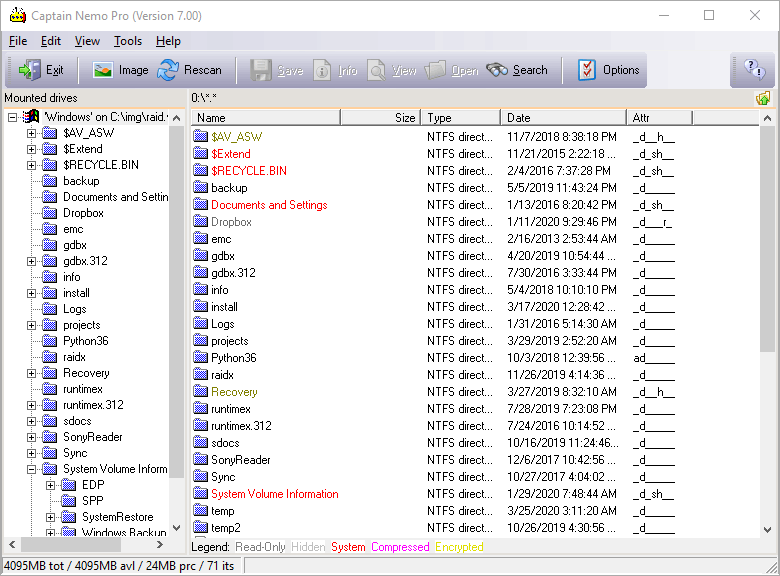
Captain Nemo:
raid.vimmounted with Captain NemoOption 1: Mount the image with Captain Nemo. That is the recommended path if there is little or no file system damage. The advantage of Captain Nemo over GetDataBack is that Captain Nemo gives you immediate access to your files while GetDataBack will need to scan your image first.

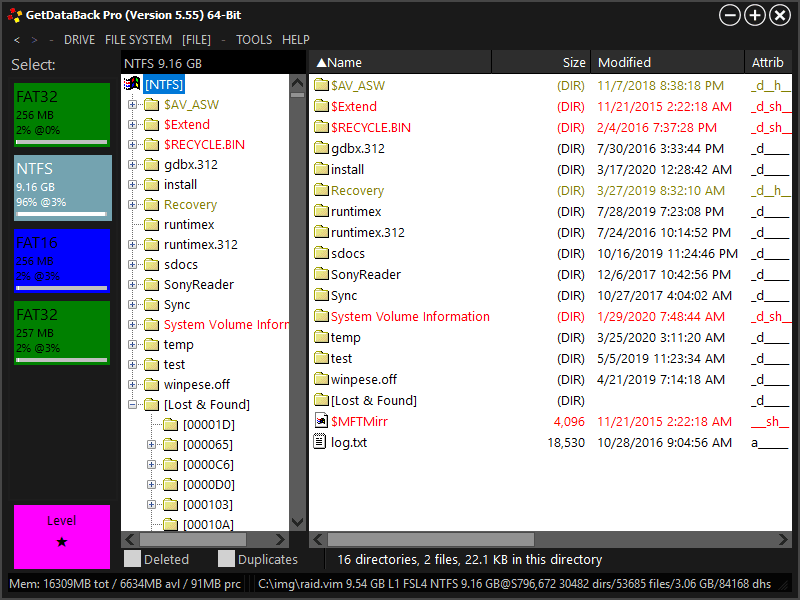
GetDataBack Pro:
raid.vimscanned with GetDataBack ProOption 2: Scan the image with GetDataBack Pro. If there is significant file system damage or Captain Nemo does not bring the results you expect, you will need to download GetDataBack Pro to process the image you just created.
Once you gain access to your files with either one of the options above, you can copy them to a safe location.