C:\img\dyn1.imc
C:\img\dyn2.imc
C:\img\dyn3.imc
Start RAID Reconstructor.
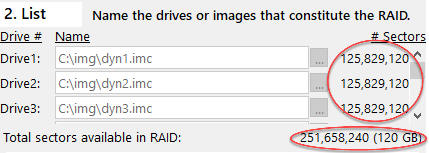
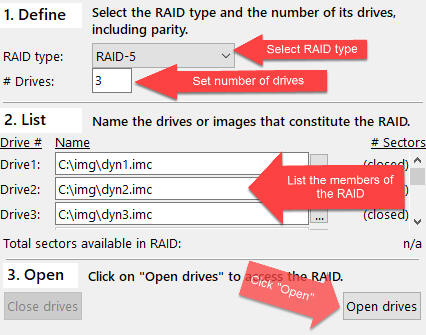
Select RAID-5 as the RAID type, set # Drives to 3. Type the names of the image files into the fields labeled Drive1, Drive2, and Drive3.
Click Open drives.
Verify that all 3 drives show the size of 125,829,120 sectors and that the total size shows
(Number_Of_Drives-1) * Size_Of_Smallest_Drive = (3-1) * 125,829,120= 251,658,240 sectors
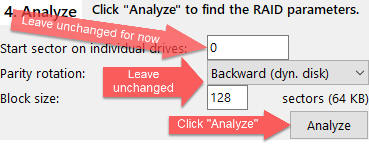
As this RAID is a Windows Dynamic RAID-5, we should set the Start sector to its correct value, if we only knew what that value is. Leave Start sector at 0 for now and let's look at the analysis anyways. We will show later how to find the Start sector.
Also, leave the Block size and the Parity rotation unchanged. These values will be determined by the analysis we are going to start now.
Click Analyze.
The analysis wizard will start:
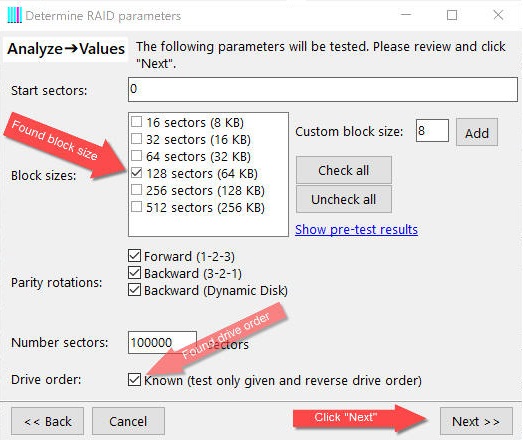
Select Managed Auto (2020) and click Next. The wizard performs a pre-test. It determines the block size (128), and the drive order. This will greatly reduce the permutations performed next.
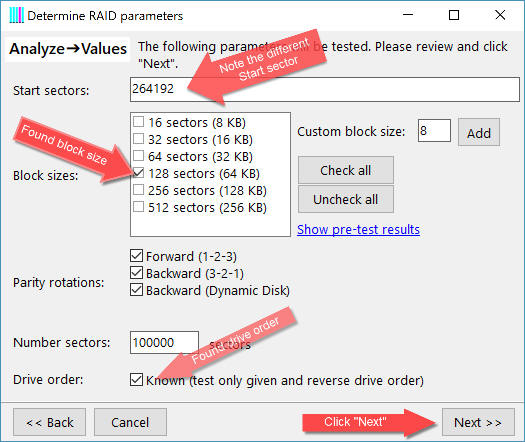
We want to leave the parameters and the number of sectors that we want to probe unchanged. Click Next.
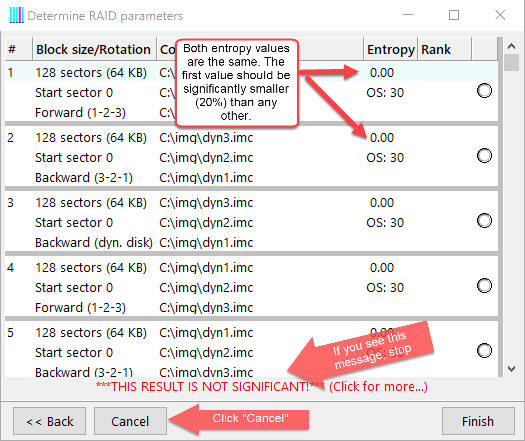
The entry found is not significant. It has almost the same entropy as the 2nd entry. Click Cancel.
This was kind of expected, as we have not used the correct start sector yet. We will now determine the value of the start sector.
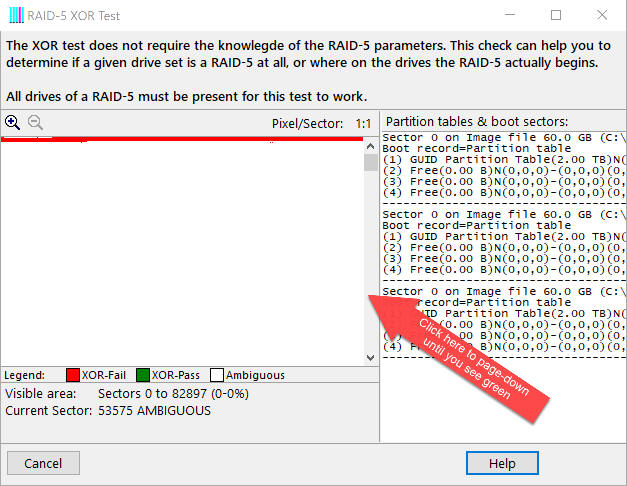
Click Tools->XOR test, then click Start.
Click page-down until you see the green XOR-Pass color.
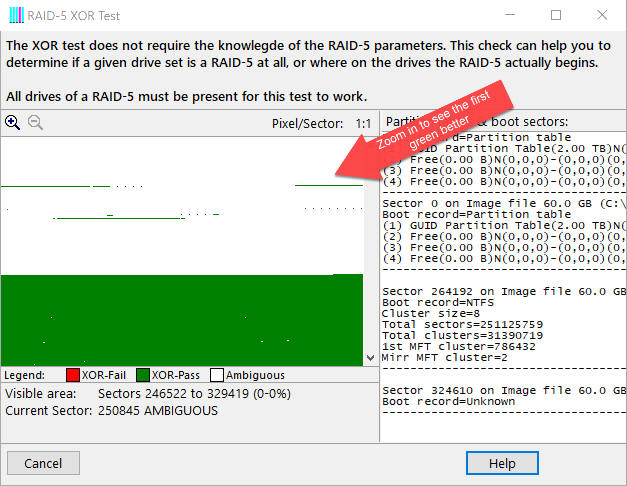
Zoom in to better see the green area:
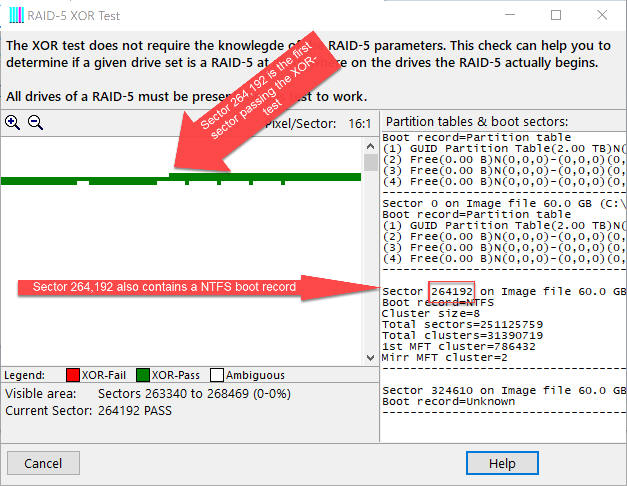
We see two exciting things:
Sector 264,192 appears to be the start sector we are looking for.
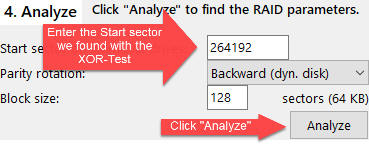
Let's go back to 4. Analyze and enter 264,192 as Start sector.
Click Analyze.
The analysis wizard will start again
:
Select Managed Auto (2020) and click Next. The wizard performs a pre-test. It determines the block size (128), and the drive order. This will greatly reduce the permutations performed next.
We want to leave the parameters and the number of sectors that we want to probe unchanged. Click Next.
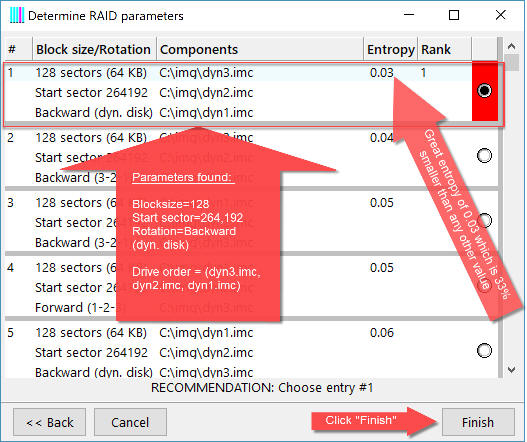
What we get now is much better. The entropy of 0.03 is significantly smaller than the entropy of the next entry, 0.04. We get a "RECOMMENDATION: Choose entry #1".Click Finish to move these values to the main screen.
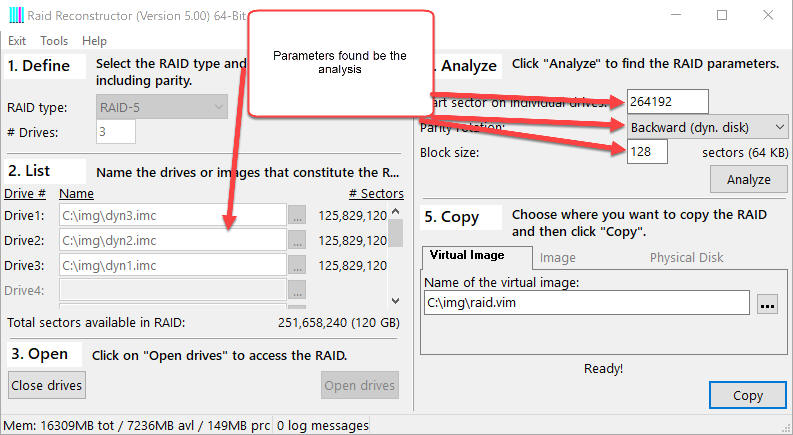
The found parameters got transferred into the corresponding fields in the main screen:
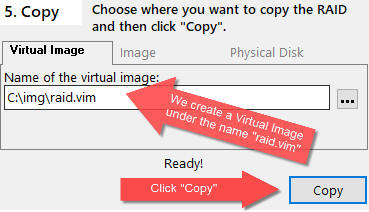
Now we are ready to copy the combined array to a virtual image file. Specify a target file name and click Copy.
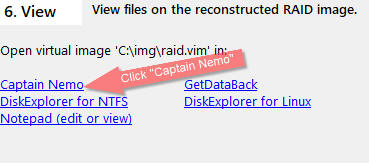
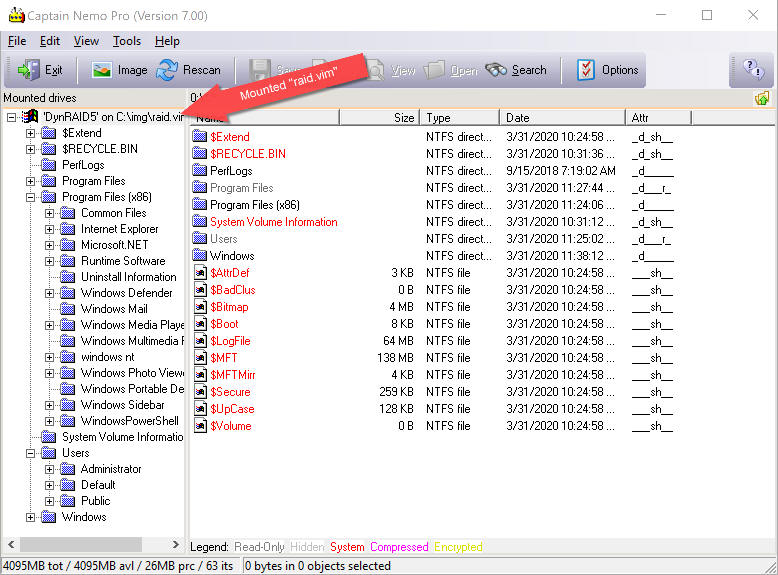
Immediately after clicking Copy we have a small file c:\img\raid.vim. Mount this image with Captain Nemo or scan it with GetDataBack in order to retrieve the data from it.
Click on Captain Nemo
Voilà, you are ready to copy your files off the lost RAID.
See also: